 Save to Pinterest
 There's something about pulling apart warm cinnamon rolls that makes everyone at the table feel like kids again, and the first time I shaped one into a snowflake, I realized I'd accidentally stumbled onto pure magic. My kitchen smelled like brown sugar and butter as I twisted those strips into points, and when I slid it out of the oven golden and glistening, my partner actually gasped. It became our winter tradition that very morning, the kind of recipe that transforms an ordinary Tuesday breakfast into something people talk about for weeks.
I'll never forget my mom's face when I brought this to our holiday gathering last December—she kept going back for more pieces even though she swore she was too full. We ended up eating it while playing board games, passing pieces around, and honestly, it became less about the food and more about having an excuse to keep our hands full while we laughed together.
Ingredients
- All-purpose flour (3 1/4 cups): This is your foundation, and measuring by weight makes a real difference—too much flour and your dough gets dense, and I learned that lesson the hard way.
- Active dry yeast (2 1/4 tsp): Make sure it's fresh and that your milk isn't too hot or you'll kill the yeast before it has a chance to work its magic.
- Warm milk (3/4 cup): Around 110°F is perfect—if you're unsure, test it on your wrist like you would for a baby's bottle.
- Unsalted butter (1/4 cup melted, plus 1/4 cup softened): Using both melted and softened butter serves different purposes, so don't try to skip one or substitute—each does its job.
- Granulated and brown sugar: The granulated sugar feeds the yeast, while the brown sugar in the filling creates those sweet, caramelized layers that make people close their eyes when they take a bite.
- Ground cinnamon (2 tsp): Don't skimp here—fresh cinnamon tastes nothing like the stale stuff, and it's the soul of this recipe.
- Egg (1 large, room temperature): A room-temperature egg mixes into the dough more smoothly and helps create that tender crumb.
- Powdered sugar and vanilla extract for icing: These finish the dish with sweetness and warmth, so use real vanilla if you can.
Tired of Takeout? 🥡
Get 10 meals you can make faster than delivery arrives. Seriously.
One email. No spam. Unsubscribe anytime.
Instructions
- Wake up the yeast:
- Combine your warm milk, sugar, and yeast in a large bowl and let it sit for 5–10 minutes until it's foamy and alive—you'll smell something sweet and slightly beery, which means it's ready to go. If nothing happens, your yeast is dead and you'll need to start over.
- Build the dough:
- Add the melted butter, egg, and salt, then gradually mix in the flour until everything comes together into a shaggy dough. It won't be perfect yet, and that's exactly right.
- Knead into softness:
- Work the dough on a floured surface for 5–7 minutes, pushing with the heel of your hand and folding it back over itself until it's smooth and elastic and stops sticking to everything. Your arms will feel it, but the dough will feel like silk.
- Let it rise:
- Place it in a greased bowl, cover it with a towel, and leave it somewhere warm for about an hour until it's doubled—your oven with the light on works perfectly if your kitchen is chilly. Patience here is everything.
- Shape the magic:
- Preheat your oven to 350°F and line a baking sheet with parchment paper. Punch down the risen dough (yes, really punch it—it's therapeutic) and divide it into three equal pieces. Roll each into a 12-inch circle, trying to keep them roughly the same thickness.
- Layer the filling:
- Place the first circle on your baking sheet. Spread half the softened butter over it, then sprinkle with half the cinnamon sugar mixture. Top with the second circle, add the remaining butter and cinnamon sugar, then finish with the third circle. You're building a three-layer cinnamon roll masterpiece.
- Create the snowflake:
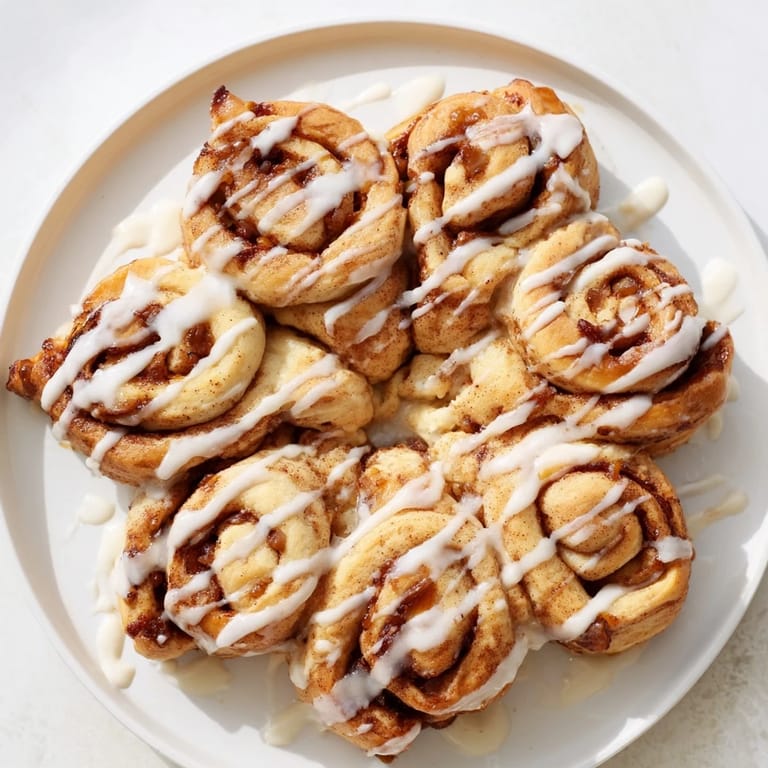
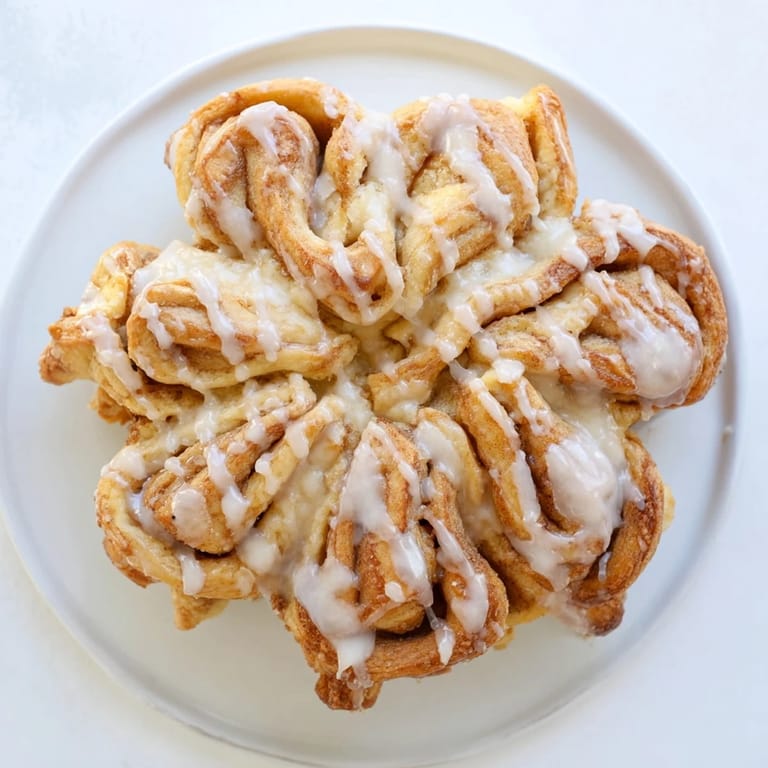
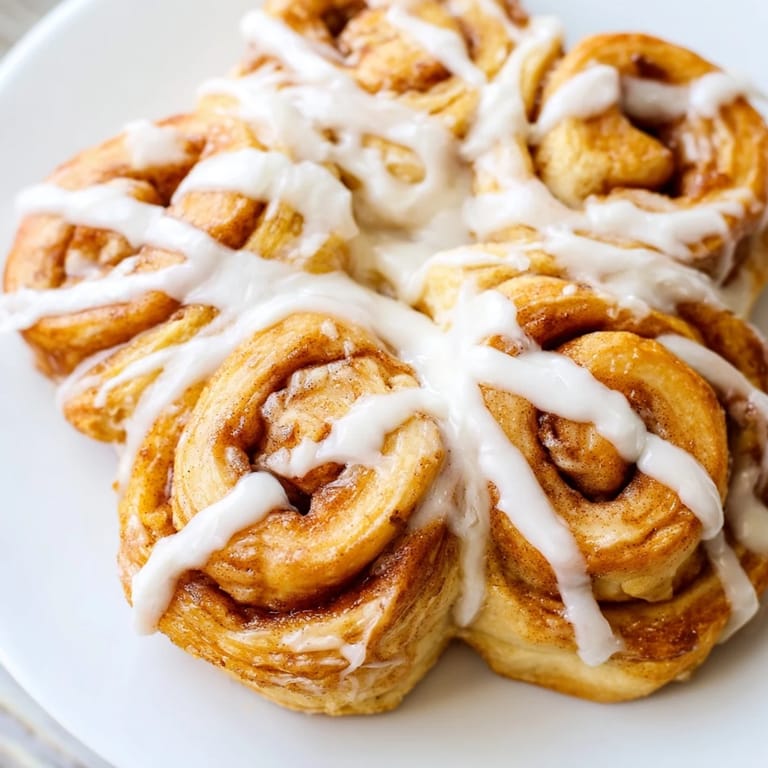
- Place a small glass in the center of your dough—don't cut through it, just use it as a guide. Using a sharp knife, cut the dough into 16 equal strips radiating outward like spokes on a wheel. Now for the fun part: take two adjacent strips, twist them away from each other twice, then pinch the ends together to create a point—repeat with all the pairs to form your snowflake shape.
- Final rise:
- Remove the glass carefully and cover the snowflake loosely with a towel. Let it rest for 15 minutes while you enjoy a quiet moment—it needs a little time to puff up again.
- Bake until golden:
- Slide it into the oven for 22–25 minutes, watching until the edges turn golden brown and the smell fills your entire house. You'll know it's done when you can't resist anymore.
- Finish with icing:
- Let it cool for 10 minutes, then whisk together your powdered sugar, milk, and vanilla extract until smooth. Drizzle it generously over the warm snowflake—the warmth will make it glisten and slightly melt into the cinnamon swirls. Let everyone pull apart their own pieces.
 Save to Pinterest
 The memory that stays with me is my daughter asking if we could make this every Friday night, and me realizing that I'd created something that people wanted to gather around. It wasn't just breakfast anymore—it was an excuse to slow down together.
Making It Your Own
This recipe is incredibly forgiving once you understand the fundamentals, and I've had so much fun experimenting with it over the years. For a richer, more custard-like dough, substitute half the milk with heavy cream—it makes everything slightly more luxurious and feels special even for a casual morning. I've also added chopped toasted pecans or raisins to the filling, and while it changes the texture slightly, it adds a sophisticated crunch that people love.
Pairing and Serving
This snowflake begs to be served warm with something hot to drink, and I've never had anyone turn down a cup of coffee or hot chocolate alongside a piece. The warm cinnamon filling and soft dough taste even better when you're cradling something warm in your other hand, creating that cozy ritual that makes winter mornings feel intentional instead of rushed.
Storage and Make-Ahead Tips
You can prepare the dough the night before, cover it, and refrigerate it overnight—just let it come to room temperature and rise for 30 minutes before shaping. I've also frozen the shaped snowflake before baking, and it thaws and rises beautifully if you give it a couple of hours at room temperature. Leftovers last about two days covered loosely with foil, and honestly, cold cinnamon roll snowflakes taste incredible for breakfast the next morning if you can resist eating the whole thing while it's warm.
- Make the dough in the evening and refrigerate overnight for a convenient morning bake.
- Freeze the shaped snowflake before baking for grab-and-go winter morning magic.
- If you have leftovers, gently reheat them in a low oven for a few minutes to bring back that fresh-baked warmth.
 Save to Pinterest
 This recipe has become my favorite way to say hello to the season and to the people I love, all in one pull-apart form. Make it, share it, and watch how a beautiful cinnamon roll snowflake has a way of bringing everyone closer together.
Common Recipe Questions
- → What type of flour works best for this dough?
All-purpose flour provides the ideal balance for a light yet sturdy dough suitable for shaping and rising.
- → How do I achieve the snowflake shape?
After stacking three rolled dough circles with cinnamon butter layers, cut 16 strips around a center glass and twist adjacent pairs twice, pinching ends to form points.
- → Can I add nuts or dried fruit to the filling?
Yes, chopped toasted pecans or raisins can be folded into the cinnamon sugar filling for added texture and flavor.
- → What is the best way to get a golden crust?
Baking at 350°F (175°C) for about 22–25 minutes ensures an evenly golden and fully cooked pull-apart.
- → How long should the dough rise before baking?
Let the dough rise about one hour until doubled, then after shaping, let it rise another 15 minutes for a tender crumb.
- → Is there an option to enrich the dough?
Substituting half of the milk with heavy cream creates a richer, more tender dough.