 Save to Pinterest
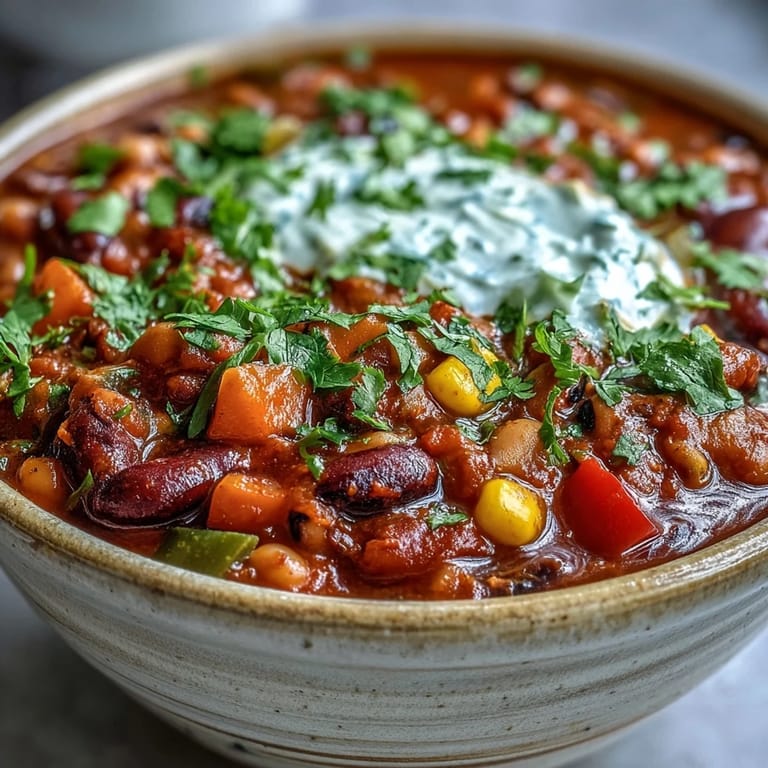
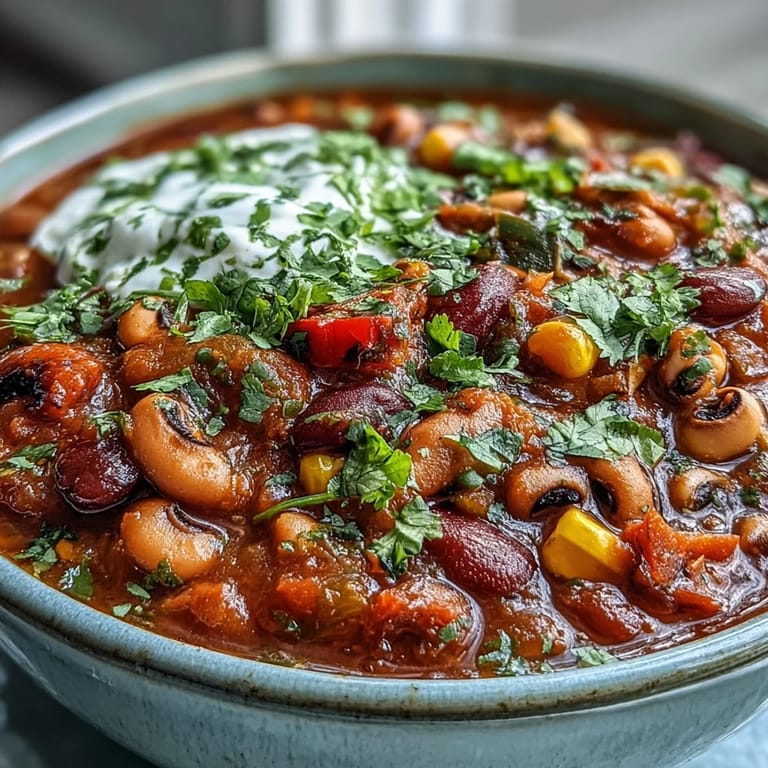
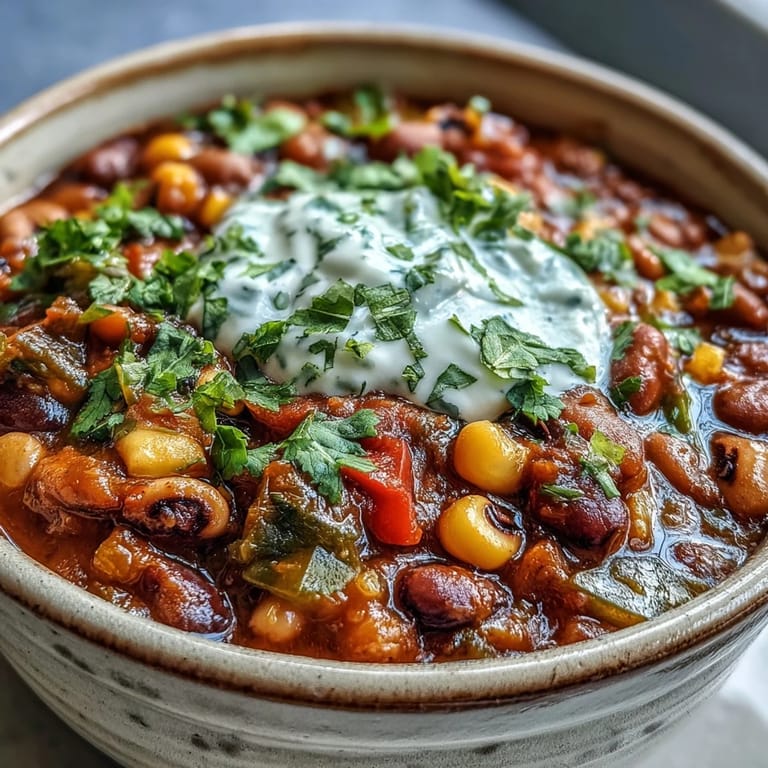
 My neighbor once brought over a pot of chili on a gray November afternoon, and I was struck by how different it tasted from the beef versions I'd grown up with. The black-eyed peas gave it this gentle, almost creamy quality that made the spices sing differently. That bowl sparked something, and now I find myself making this vegetarian version whenever I want something that feels both comforting and alive on the stove.
I served this chili to a group of friends who were skeptical about the meatless version, and watching them quietly go back for seconds told me everything. Someone asked for the recipe before they'd even finished their bowl, which felt like the highest compliment a home cook could receive.
Ingredients
- Black-eyed peas: The heart of this chili, they're milder than kidney beans and absorb flavors beautifully, whether you use canned or cook dried ones from scratch.
- Kidney beans: These add body and a slight earthiness that deepens the overall flavor profile.
- Onion, garlic, and bell peppers: This aromatic base is where the layering begins, so don't rush this step.
- Carrot and celery: They soften into the background but build a subtle sweetness that balances the heat.
- Diced tomatoes and tomato paste: Together they create acidity and richness that no single ingredient could provide alone.
- Corn kernels: A touch of sweetness that makes each spoonful interesting, whether fresh or frozen.
- Vegetable broth: Use a good quality version or homemade if you have it, as it becomes the foundation of your finished chili.
- Cumin and chili powder: These two are essential, toasted briefly to unlock their warm, deeper flavors.
- Smoked paprika: This is what gives the chili its subtle smokiness, making it feel like it's been simmering longer than it has.
- Oregano and cayenne: Small amounts that pack a punch, so taste as you go.
- Olive oil: Use enough to coat the bottom of your pot, as it carries the flavors when you sauté.
Tired of Takeout? 🥡
Get 10 meals you can make faster than delivery arrives. Seriously.
One email. No spam. Unsubscribe anytime.
Instructions
- Sauté your aromatic base:
- Heat olive oil in a large pot over medium heat and add the onion, garlic, carrot, celery, and bell peppers. Watch them soften and turn slightly translucent, about 5 to 7 minutes, letting them release their aromas into the oil.
- Bloom the spices:
- Stir in the cumin, chili powder, smoked paprika, oregano, and cayenne, cooking for just 1 minute until the kitchen smells like warmth and possibility. This quick toast unlocks flavors that would stay locked if you skipped it.
- Toast the tomato paste:
- Add the tomato paste and stir it into the spiced vegetables for 1 minute, letting it caramelize slightly and lose its raw edge. This small step makes a surprising difference in depth.
- Build the liquid foundation:
- Add the diced tomatoes with their juice, vegetable broth, black-eyed peas, kidney beans, and corn, stirring everything together until combined. Bring to a gentle boil, then reduce the heat to low.
- Simmer and meld:
- Cover and let the chili simmer for 25 to 30 minutes, stirring occasionally, until the vegetables are tender and the flavors have started speaking to each other. The longer you let it sit, the more the spices integrate.
- Taste and adjust:
- Before serving, taste the chili and season with salt and black pepper to your preference. This is your moment to make it exactly yours.
 Save to Pinterest
 There was a moment when my daughter tasted this and asked if it was actually chili or something I invented, and I realized that was the exact moment it stopped being just a recipe and became our thing. Now whenever the weather turns cold, she asks me to make it without prompting.
Building Layers of Flavor
This chili works because it respects the order of operations. The vegetables soften first, creating a cushion for the spices. The spices bloom next, waking up and releasing their essential oils. The tomato paste caramelizes slightly, adding depth. Only then does the liquid go in, allowing everything that came before to be the foundation. It's not complicated, but it's intentional.
Customizing for Your Taste
I've learned that this chili is flexible in the best way. Some days I add diced sweet potato for natural sweetness, other times I use zucchini to keep it lighter. The recipe wants to work with you, not against you. If you prefer more heat, add another quarter teaspoon of cayenne. If you like it thicker, that's what those beans are for.
Serving and Storing
Serve this hot with whatever toppings call to you: fresh cilantro adds brightness, sour cream or yogurt adds tang and creaminess, jalapeños add heat, and cheese adds richness. I love it alongside cornbread because the chili softens the bread slightly, creating this perfect texture contrast. This chili keeps well in the refrigerator for up to 5 days and freezes beautifully for months, making it ideal for those moments when you want something hearty but don't want to cook.
- Leftover magic: Reheat gently on the stove, adding a splash of vegetable broth if it's gotten too thick.
- Make it a meal: Serve over rice, with cornbread on the side, or in a bowl with all the toppings you love.
- Batch cooking tip: Double the recipe and freeze half, so you always have comfort food waiting.
 Save to Pinterest
 This chili has become my answer to so many kitchen moments, whether I'm cooking for myself on a quiet evening or feeding a table full of people. There's something honest about it that never gets old.
Common Recipe Questions
- → Can I use dried black-eyed peas instead of canned?
Yes, soak dried peas overnight and cook until tender before adding to the chili. This takes more time but allows you to control sodium levels and texture.
- → How can I make this chili thicker?
Mash about a cup of the cooked beans and peas against the side of the pot during simmering. This releases starch and naturally thickens the liquid without needing additional ingredients.
- → What vegetables work well in this dish?
Beyond the classic mirepoix and bell peppers, try adding diced sweet potatoes, zucchini, or butternut squash. These complement the earthy peas and add extra sweetness and nutrition.
- → How long does this keep in the refrigerator?
Stored in an airtight container, this chili will keep for 4-5 days. The flavors actually improve after a day or two as the spices continue to meld with the vegetables and beans.
- → Can I freeze this for later?
Absolutely. Portion cooled chili into freezer-safe containers, leaving some space for expansion. It freezes well for up to 3 months. Thaw overnight in the refrigerator before reheating.
- → What's the best way to adjust the heat level?
Start with half the cayenne and taste after simmering. You can always add more, but you can't remove it. For smoky heat without too much burn, increase the smoked paprika instead.