 Save to Pinterest
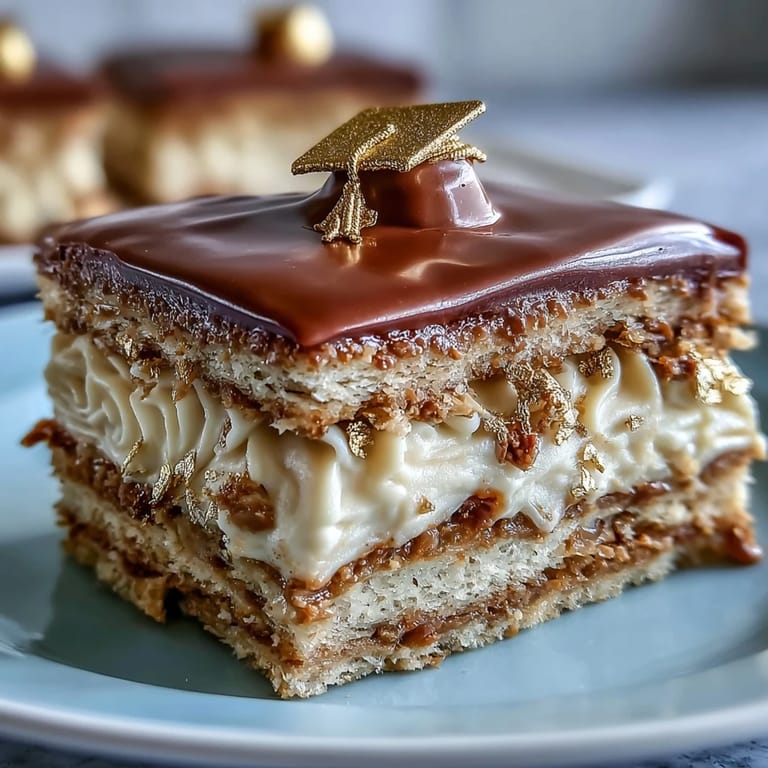
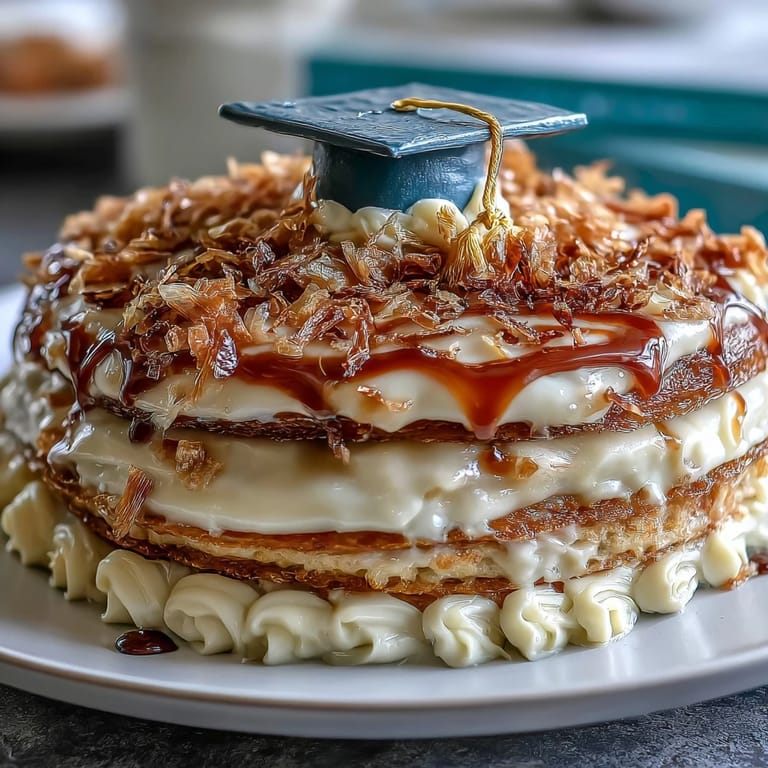
 My daughter had just walked across the stage in her cap and gown when I realized I'd promised to bake her a graduation cake, and I had roughly six hours to pull it off. Standing in the kitchen at 2 PM with my mixer humming and flour dust settling on the countertop, I felt that particular kind of pressure that comes with wanting to make something memorable for someone you're proud of. This cake—with its golden foil catching the light and that little diploma perched on top—became less about following a recipe and more about showing up for a moment that mattered.
I'll never forget my son leaning against the kitchen island while I was working on the frosting, talking about his college plans and his friends and everything changing, and how this cake was just sitting there getting more beautiful by the minute without him even noticing. By the time we set that diploma topper down and stepped back to look at it, the cake had become part of the whole story of the day—not just dessert, but this tangible thing we'd made together to mark a threshold.
Ingredients
- All-purpose flour (2 ½ cups): The foundation of a tender crumb, and bringing it to room temperature means the batter stays smooth instead of developing streaks of unmixed flour hiding in the bottom of the bowl.
- Baking powder (2 ½ tsp): This gives you that reliable rise without any weird aftertaste, and measuring it flat with a knife instead of heaping it up makes a genuine difference in how evenly the cake rises.
- Unsalted butter (1 cup for cake, 1 ½ cups for frosting): Soft butter creams properly with sugar, which is where the magic happens—if it's too cold or melted, your frosting either turns grainy or too thin to work with.
- Granulated sugar (2 cups): This dissolves into the butter and creates the fluffy base that makes the cake tender, and you'll actually feel the mixture change texture under the beaters as it goes from grainy to pale and pillowy.
- Large eggs (4, room temperature): Cold eggs won't incorporate properly and can cause the batter to break, but room temperature eggs blend in so smoothly that the batter becomes almost silky.
- Vanilla extract (1 tbsp for cake, 2 tsp for frosting): This is what makes the cake smell like a celebration, and it's worth using pure vanilla instead of imitation because the flavor actually makes people pause mid-bite and ask what you did differently.
- Whole milk (1 cup for cake, 3–4 tbsp for frosting): The milk keeps the crumb moist and tender, and alternating it with flour prevents you from overworking the batter and ending up with something tough.
- Powdered sugar (5 cups, sifted): Sifting removes lumps before you even start mixing, which saves you from that grainy texture that makes otherwise beautiful frosting look slightly off.
- Edible gold foil sheets: These are fragile and magical, and they stick to frosting better than you'd expect, though your hands need to be dry or you'll crumple them.
- Diploma-shaped topper: Store-bought ones work beautifully, but making one from fondant and edible markers gives the whole cake a personal touch that feels intentional.
- Optional sprinkles or star confetti: These catch light similarly to the gold foil and add visual interest without overwhelming the elegant simplicity of the design.
Tired of Takeout? 🥡
Get 10 meals you can make faster than delivery arrives. Seriously.
One email. No spam. Unsubscribe anytime.
Instructions
- Get Your Pans Ready:
- Preheat the oven to 350°F and line two 9-inch round pans with parchment paper—this prevents sticking and means you can invert the cakes cleanly without broken edges. Greasing the pans too gives you extra insurance that nothing will stick.
- Mix Your Dry Ingredients:
- Whisk flour, baking powder, and salt together in a medium bowl, which breaks up any lumps in the flour and distributes the leavening evenly. This takes about a minute and prevents dense pockets in your finished cake.
- Cream Butter and Sugar:
- Beat butter and sugar together for 3–4 minutes on medium-high speed until the mixture looks pale and fluffy, almost like frosting already—you'll notice it transforms from grainy to light and fluffy under the beaters. This incorporates air, which helps the cake rise properly.
- Add Eggs One at a Time:
- Add one egg, beat until it's combined, then add the next—rushing this step or dumping them all in at once can cause the batter to look broken or curdled. Taking 30 extra seconds here prevents a dense, heavy crumb.
- Stir in Vanilla:
- After all eggs are added, mix in the vanilla extract and pause to smell what you've created—that's the promise of what's coming.
- Alternate Flour and Milk:
- Add about a third of the flour mixture, then half the milk, then another third of flour, then the remaining milk, and finally the last of the flour, mixing on low speed after each addition just until combined. This prevents overmixing, which would develop gluten and make the cake tough instead of tender.
- Divide and Smooth:
- Pour batter evenly into the prepared pans and smooth the tops with a spatula so both layers bake at roughly the same rate. Uneven surfaces bake unevenly.
- Bake Until Golden:
- Bake for 28–32 minutes, checking at 28 minutes with a toothpick inserted in the center—when it comes out clean or with just a few moist crumbs clinging to it, the cakes are done. A few extra minutes in the oven creates a firmer crumb that's easier to frost, but overbaking dries things out.
- Cool Properly:
- Let cakes cool in the pans for 10 minutes (this helps them set without crumbling), then turn them out onto wire racks to cool completely, which takes about an hour. Trying to frost a warm cake turns the frosting into a melted puddle.
- Make the Buttercream:
- Beat softened butter on high speed for about 3 minutes until it's pale and creamy, then gradually add powdered sugar while beating, which prevents lumps and keeps everything smooth. Add vanilla, salt, and milk a tablespoon at a time until the frosting reaches a consistency that spreads easily but holds its shape.
- Assemble the Cake:
- Level the cooled cakes with a serrated knife if they domed up, place one layer on a serving plate, spread a thick layer of buttercream on top, and set the second layer down gently. This is where the cake becomes one unit instead of two separate things.
- Apply the Crumb Coat:
- Spread a thin layer of frosting over the entire outside of the cake, chill it for 30 minutes, then apply a thicker final coat of frosting—the crumb coat seals in stray crumbs so your final frosting looks polished. This extra step is what separates a homemade cake from a bakery-looking cake.
- Smooth the Final Frosting:
- Apply the remaining buttercream in smooth, generous strokes, using an offset spatula or even a butter knife for a slightly rustic look that still reads as intentional and elegant.
- Apply the Gold Foil:
- Using tweezers and dry hands, carefully place edible gold foil sheets onto the frosted cake in a pattern that appeals to you—along the top edge, scattered across the sides, or in a deliberate stripe. The gold catches light and transforms the cake from pretty to spectacular.
- Add the Diploma Topper:
- Position the diploma topper at the center or to one side of the cake, and add sprinkles or star confetti if you'd like extra visual interest. Step back and look at what you've made.
- Final Chill and Serve:
- Refrigerate briefly to set the decorations, then bring to room temperature before serving so the frosting tastes rich and the cake itself has that perfect tender crumb.
 Save to Pinterest
 What I didn't expect was how long people would look at that cake before eating it—how the gold foil would catch the afternoon light coming through the window, how someone would lean in to read the diploma topper and smile. A cake is supposed to be eaten, but this one got to be admired first, and that felt right for a day that was already about marking time and transitions.
Flavor Variations That Feel Natural
The vanilla base is classic because it lets you layer in other flavors without competing with itself. Adding a teaspoon of almond extract to the batter creates this subtle warmth that people taste but can't quite name, and if you want the frosting to match school colors, gel food coloring works better than liquid because it doesn't water down the consistency—a tiny drop goes a long way. Some people swear by adding lemon zest or a tablespoon of fresh lemon juice to brighten the whole thing, and that works beautifully too if your graduate's favorite flavor leans toward citrus.
Decorating Beyond Gold Foil
The gold foil is stunning, but if edible gold isn't calling to you, fresh flowers, pearl dust, or even simple piped borders in buttercream can look equally elegant and take less precision. If you're making this cake weeks in advance, the sponge layers freeze beautifully wrapped tightly—frosting after thawing means you're not scrambling the day of. The diploma topper is where personality comes in; whether you buy it, make it from fondant with edible markers, or even craft one from rolled fondant shaped by hand, it becomes the story of what this cake celebrates.
Make-Ahead and Storage Wisdom
This cake reaches peak flavor and texture when eaten within two days of frosting, but the unfrosted layers keep well frozen for up to three weeks wrapped individually. The buttercream stays smooth at room temperature for several hours, so you can frost this cake in the morning and it will still look beautiful at an evening celebration, and if the kitchen is particularly warm, chill it again 30 minutes before serving so the frosting stays neat.
- Store leftover cake covered at room temperature for one day, then move it to the refrigerator where it lasts another two days without drying out.
- If making this cake the day before the celebration, frost it, chill it, add the topper and gold foil the morning of, and let it sit at room temperature about an hour before the party so all the flavors are at their best.
- The edible gold foil won't harm you if eaten, but it also won't taste like anything, so it's purely visual—which is exactly the point.
 Save to Pinterest
 This cake carries the weight of a moment that mattered, and making it with your own hands—feeling the batter transform, watching the gold foil catch light—is part of what makes it special. Serve it with champagne or sparkling cider, gather people you love around the table, and let this cake be the edible version of saying, we're so proud of you.
Common Recipe Questions
- → How do I prevent the buttercream from melting?
Keep the cake cool while frosting and chill between layers to ensure the buttercream stays firm and smooth during application.
- → What is the best way to apply edible gold foil?
Use dry hands or tweezers for careful placement to avoid tearing the delicate gold sheets and maintain a clean look.
- → Can I add flavor variations to the cake batter?
Yes, adding almond extract or other mild flavors enhances the vanilla base without overpowering the cake's balance.
- → How should the cake be stored before serving?
Keep the decorated cake chilled to set the frosting and gold foil, then bring to room temperature before serving for best texture.
- → Is the diploma topper edible?
It can be store-bought or homemade using fondant or paper; for full edibility, fondant decorated with edible markers is recommended.